


What's new:
Firms now have the ability to assign multiple rates to an invoice based on who in the firm performed the work and what kind of work was accomplished. For instance, your firm has a default rate that you charge for a particular service. However, in certain circumstances you may want to charge a higher or lower rate based on when a specific staff member performed a service OR if a different service was performed by that staff member than they typically perform.
Listed below are a few examples of situations that you can now account for:
-
- Rates for More Experienced Staff or Specialized Services: A CPA at your firm typically doesn’t perform tax preparation for individual clients, but took on a special case and wants to charge a higher rate for when they perform that service.
- Rates for Discounts: Your firm is trying to get more bookkeeping clients and you want to offer those services at a discounted rate for a few of your staff members.
- Special Cases: Your firm typically doesn’t offer a service like auditing to the majority of your clients, but there are some exceptions you make for large clients. In these cases, you want to charge a higher rate when a designated staff member performs these services.
The use cases will vary depending on the needs and current set up of your firm, but you now have the ability to record and account for these situations on your invoices.
How it works:
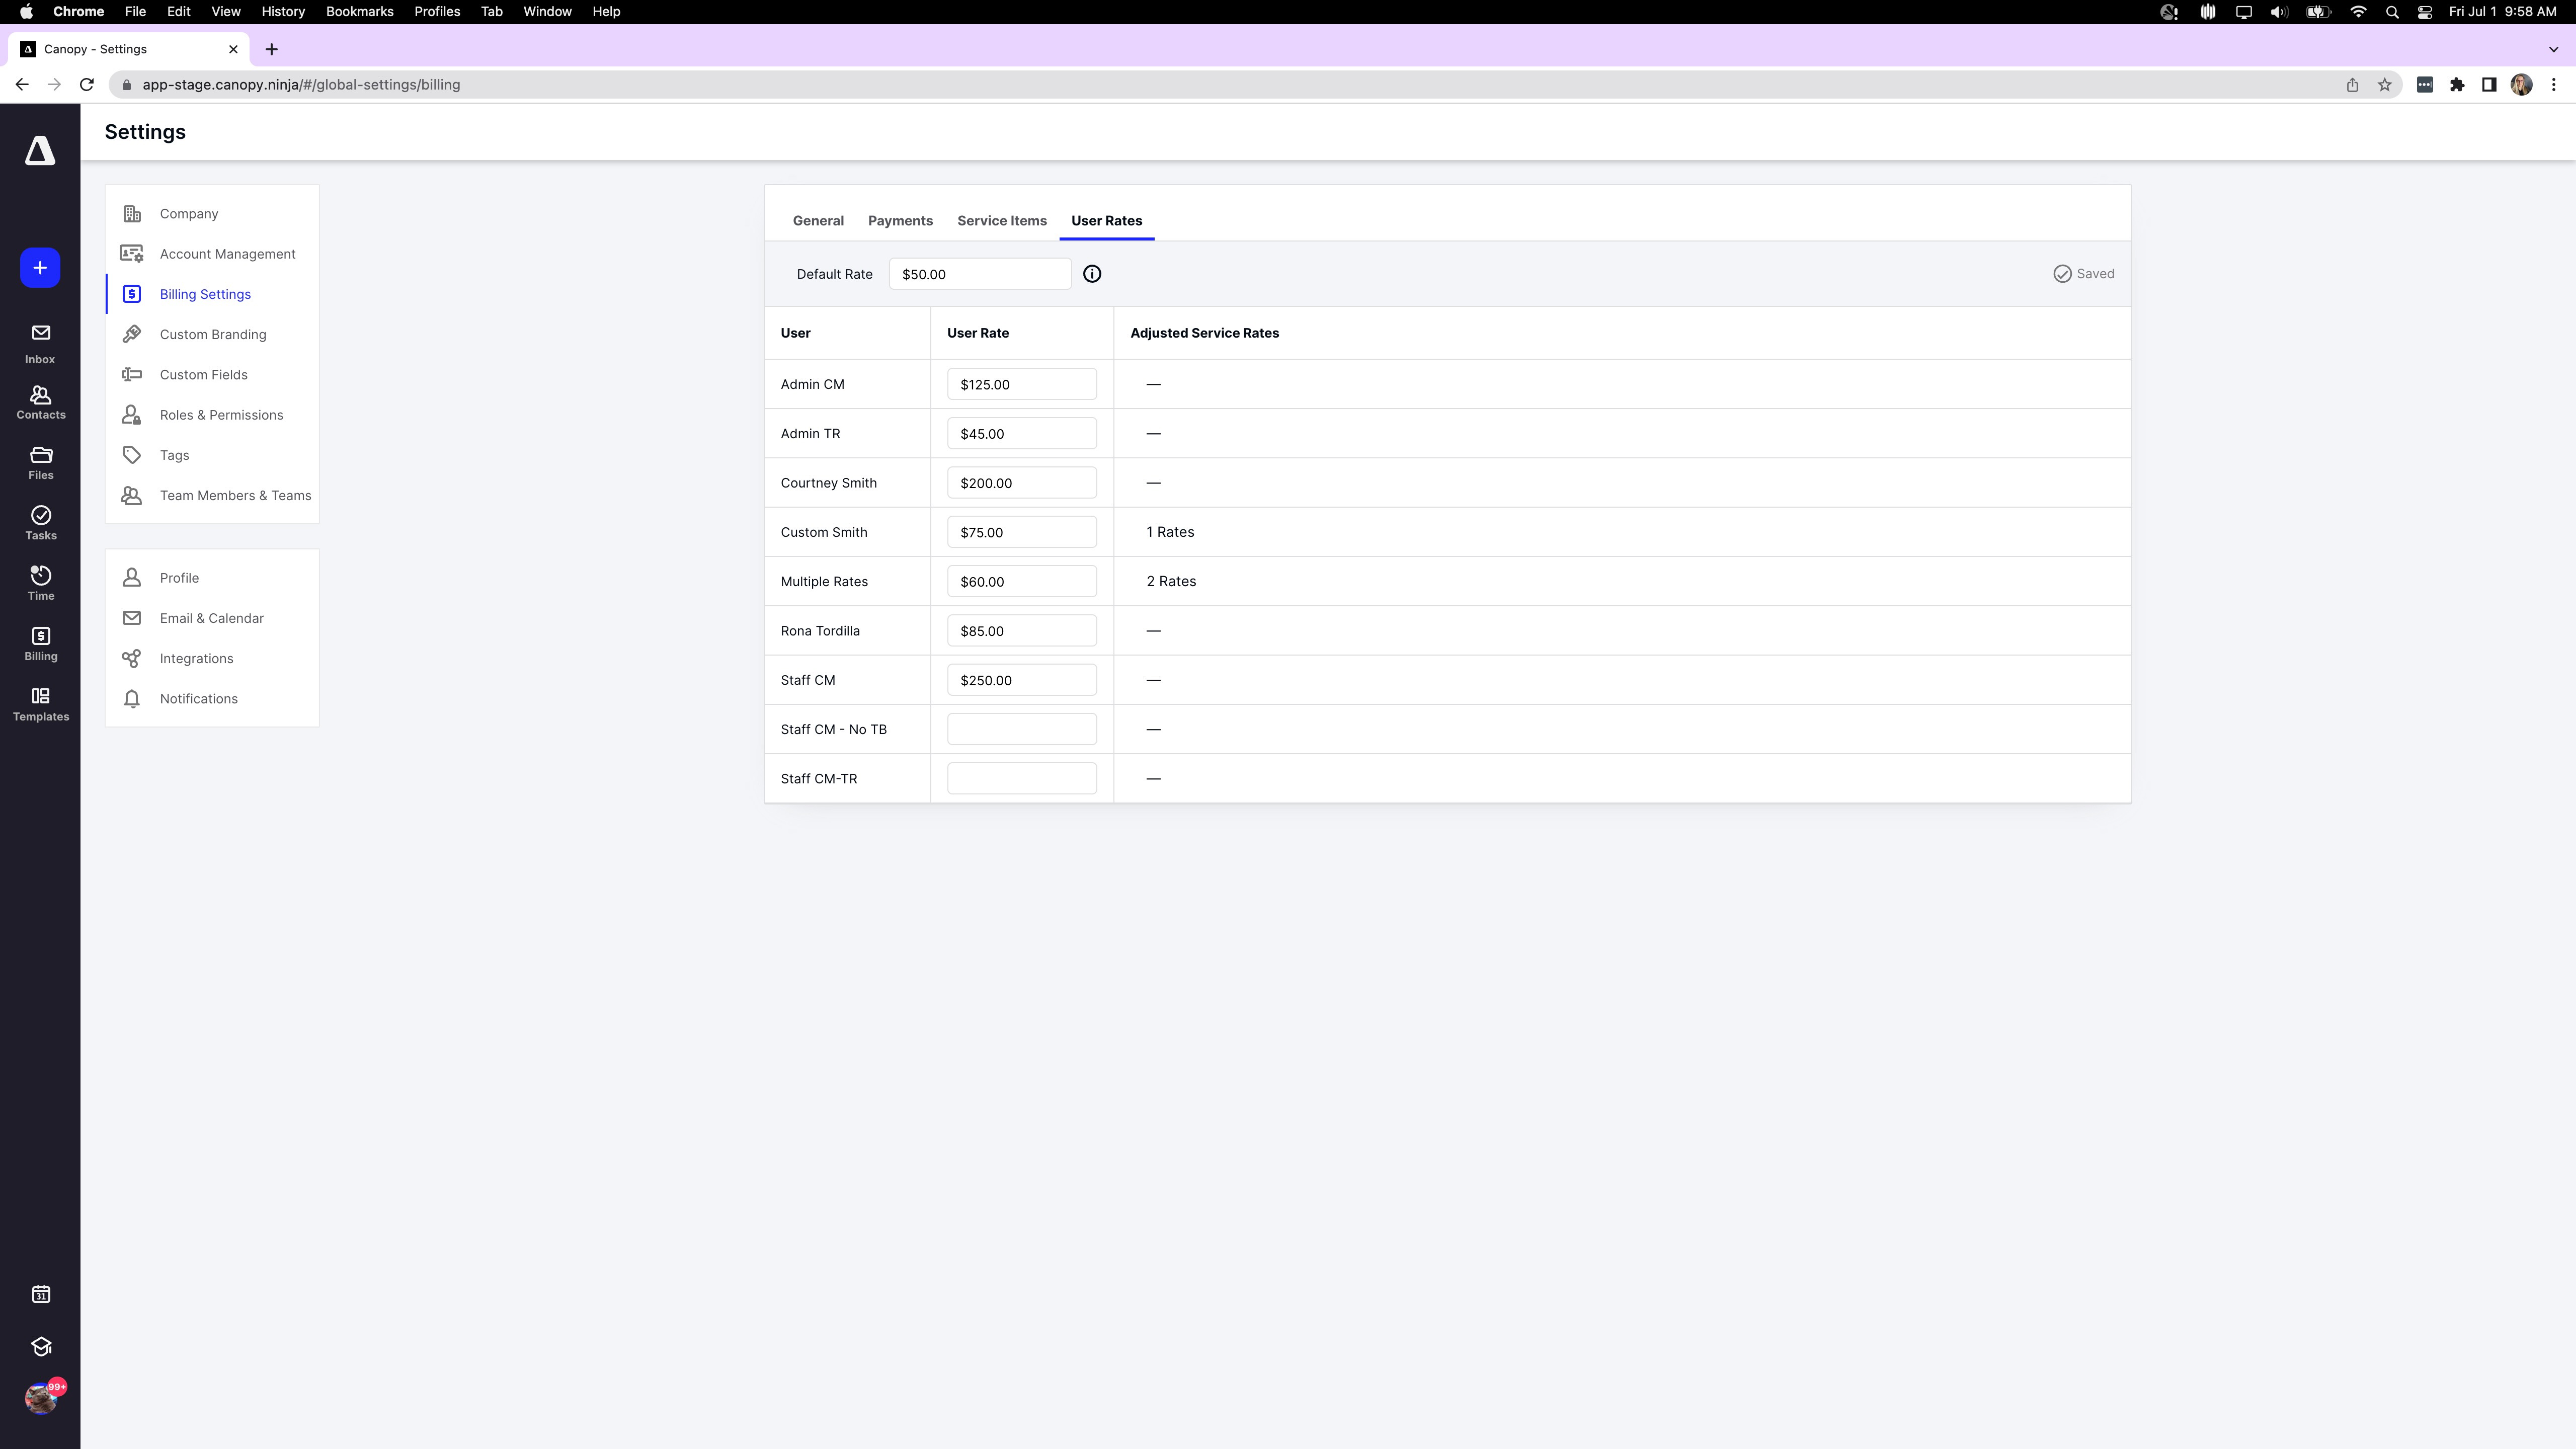
The easiest way to utilize this new feature is to have an admin set up the details in the settings tab before you perform a service, record a time entry on a task, or create an invoice. First, select the “Billing Settings” and navigate to the “User Rates” tab. This tab will look a little different now than what was previously here.
You’ll notice the default rate for the firm is listed at the top of the screen. You’ll see all of the members of your firm listed on the left under the “User” column, their typical rate listed in the “User Rate” column, and now you’ll see a new column titled “Adjusted Service Rates” on the right of the screen. You can select the blanked out area to then create multiple adjusted service rates per employee for each of the service types that you’ve previously created.
Important Note: These adjustments will only apply to hourly charged services and not flat rate services.
Once this is all set up, you can now account for those adjustments on invoices that are tied to time entries. Simply navigate to the WIP Report under the “Time” tab in your global navigation on the left of your screen. Select the time entries that you wish to invoice, select “Add to invoice” in the top right corner, and either add to a new invoice or link to an existing invoice.
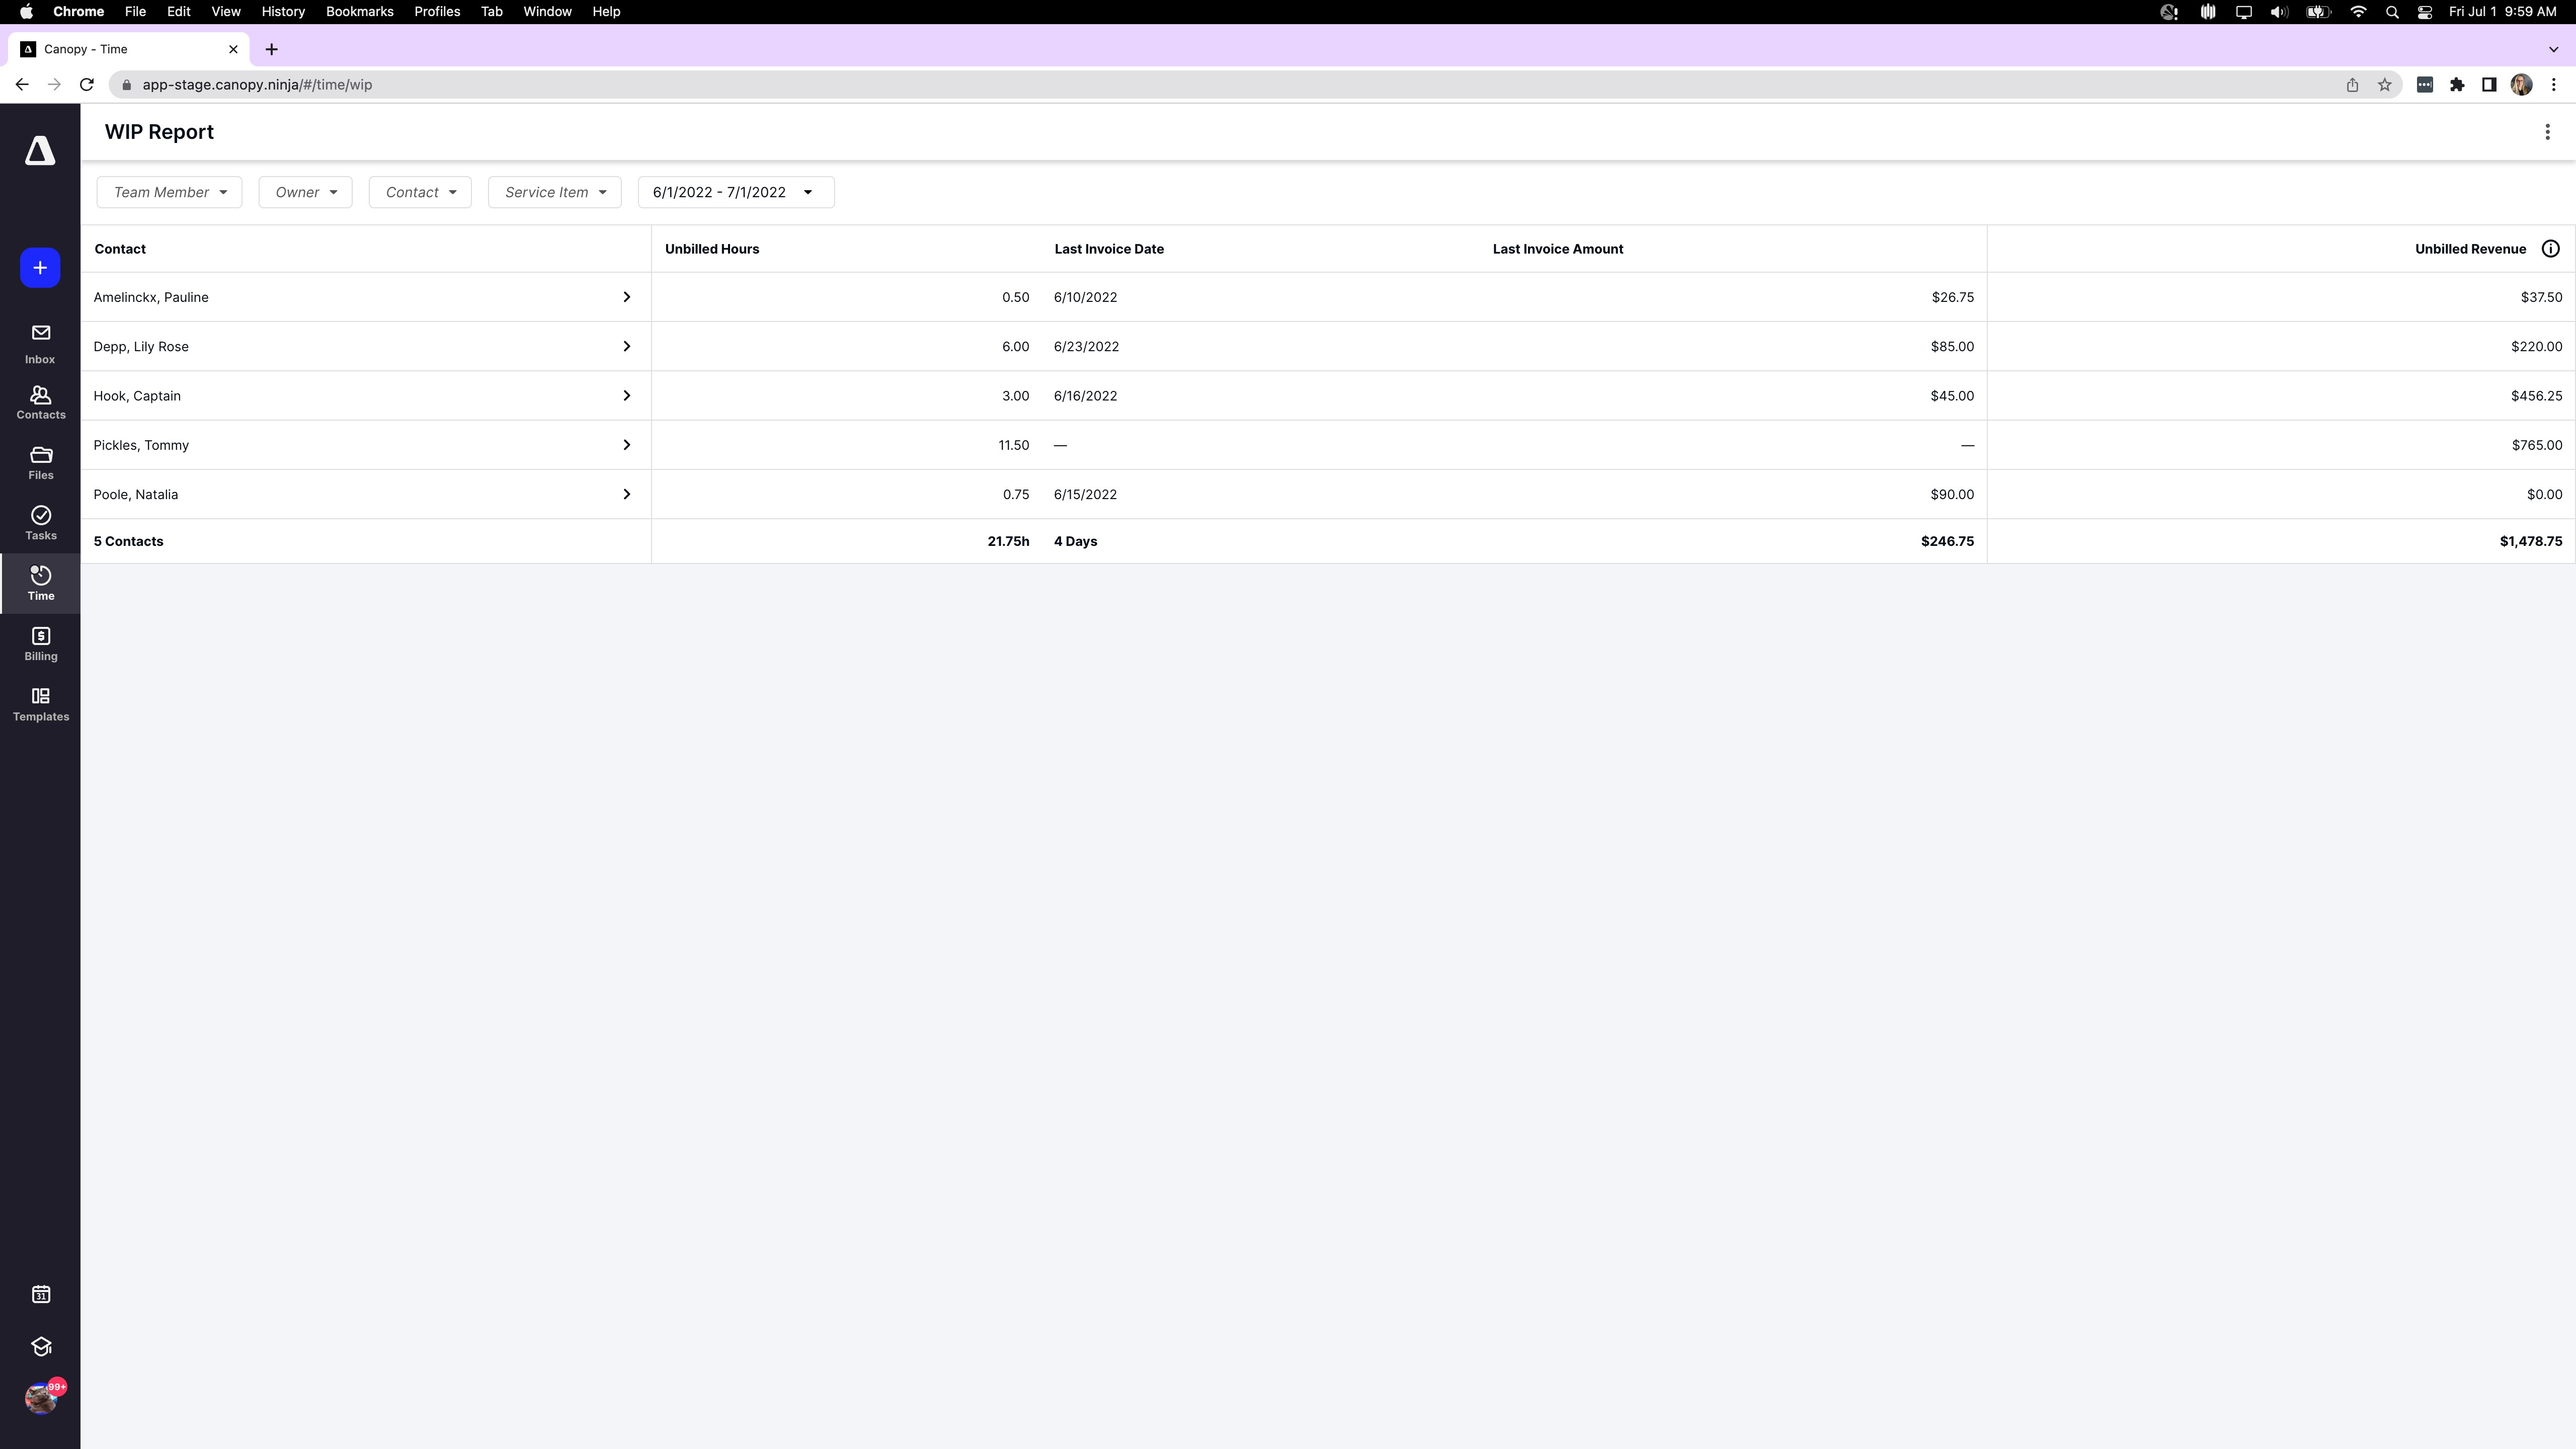
Once you are on the invoice screen then the rate should reflect your adjusted rate you designated in the billing settings if:
-
- The employee attached to the time entry matches the one you designated an adjusted rate to.
- The service also matches the designated rate adjustment on.
- The “Rate Type” is selected as “Employee.”
If all of these are met then the correct rate adjustment will be accounted for on that particular invoice.
Why it matters:
This new feature will help you easily account for those situations when you or your staff charge a higher or lower rate compared to your default pricing for a specific service when attached to a time entry.
This provides more flexibility and improves the invoicing experience by allowing you to capture information more accurately with either what is currently happening in how you charge for services in your firm or what you intend to happen.
Where to find it:
The full functionality of this feature requires you to have the Client Management, Workflow, and Time & Billing modules. Once you have these modules you’ll set up the rate adjustments in the Billing Settings section, account for time entries on tasks in the Task tab, and apply time entries to an invoice in the WIP Report (under the “Time” tab).
Get started:
Find more information by clicking the links below:
Create a Work In Progress report
Get Our Latest Updates and News by Subscribing.
Join our email list for offers, and industry leading articles and content.